
Part 1: Villa Cleaning for Large Properties – Best Professional Strategies
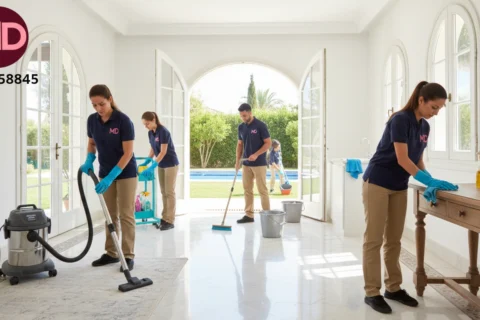
Cleaning a large villa is not simply “a bigger version of house cleaning.” The size, number of rooms, multiple floors, premium finishes, outdoor areas, and daily lifestyle patterns create a completely different challenge. The secret to a consistently impressive result is not stronger chemicals or more scrubbing—it’s a smarter system.
In this first part, you’ll learn how professionals approach large-villa cleaning using strategic planning, zone-based workflows, efficient sequencing, and quality control checkpoints. You’ll also find comparison tables that help you choose the right approach based on your villa’s layout and surfaces.

1) The “Big Villa” Mindset: Why Strategy Matters More Than Effort
Large villas can look clean on the surface while hiding dust in high corners, grease film in kitchens, soap residue in bathrooms, and dullness on marble or wooden floors. If you clean randomly, you may end up repeating tasks, moving tools back and forth, or re-contaminating surfaces (for example: cleaning the floor first, then dusting the ceiling).
Professionals treat a large villa like a project: they map the spaces, define priority zones, match tools and solutions to each surface, and follow a step-by-step sequence. This approach reduces time, avoids surface damage, and delivers a final result that “stays clean” longer.
2) Zone Strategy: The Fastest Way to Control a Large Space
The most effective method for large villas is to divide the property into zones. A zone is a group of connected spaces that share the same traffic level, function, and cleaning needs. Instead of jumping between rooms, you complete one zone before moving to the next, keeping tools and products consistent.
Example zones for a typical multi-floor villa:
- Entrance & foyer: dust, shoe marks, high touch points
- Main living & majlis: upholstery, carpets, decorative surfaces
- Kitchen: grease removal, appliances, cabinets, sinks
- Bathrooms: descaling, disinfecting, mirrors, drains
- Bedrooms: dust control, linen areas, wardrobes
- Stairs & hallways: high traffic floors, railings
- Outdoor areas: patio, garden furniture, pool edges (if applicable)
Once zones are defined, you can schedule your cleaning time and allocate labor more accurately. Zone strategy also makes it easy to track progress and maintain quality throughout the job.
3) The Golden Sequence: Clean from Top to Bottom
Large villas have more “vertical surfaces” than most homes: high ceilings, chandeliers, decorative lighting, tall curtains, and AC vents. When dust falls from above, it lands on lower surfaces and floors.
Professional top-to-bottom sequence:
- Ceilings, corners, light fixtures, AC vents
- Walls, doors, frames, switches, handrails
- Furniture surfaces, shelves, décor
- Upholstery, curtains, carpets (as needed)
- Floors (vacuum first, mop last)
This sequence prevents rework and keeps your final step—floors—clean and streak-free.
4) Priority Method: Start Where Dirt Causes the Most Damage
In large villas, two areas typically drive the overall “clean feeling”: the kitchen and bathrooms. Grease film and limescale are harder to remove when they build up, and they can leave a lasting impression even if other rooms are tidy.
Recommended priority order for deep cleaning:
- 1) Kitchen: grease, appliances, surfaces, sink hygiene
- 2) Bathrooms: disinfection, limescale, mirrors, odor control
- 3) Living areas: dust + upholstery + glass
- 4) Bedrooms: dust control + linen areas
- 5) Stairs & hallways: traffic zones
- 6) Outdoor / pool areas: seasonal or as-needed
5) Comparison Table: Random Cleaning vs Professional Plan
| Factor | Random / Unplanned | Professional Strategy |
|---|---|---|
| Time | Often increases due to repeated tasks | Reduced through correct sequencing and zones |
| Result longevity | Dust and streaks return quickly | Cleaner finish lasts longer and looks more polished |
| Product usage | Overuse is common | Right product for each surface, less waste |
| Surface safety | Higher risk of scratches or dull finishes | Lower risk due to correct tools and tested solutions |
6) The “10-Minute Walkthrough” That Saves Hours
Before you clean, spend 10 minutes walking through the villa and noting: grease hotspots (kitchen hood, backsplash), limescale (bathroom taps, shower glass), sensitive floors (wood, polished marble), and high-touch points (switches, handles). This quick inspection prevents surprises and helps you prepare tools and products in advance.
7) Tools Checklist for Large Villa Efficiency
Large properties demand the right equipment. Even the best technique becomes slow when tools are limited or incorrect. Here’s a professional-style checklist you can follow:
- HEPA vacuum: better for fine dust and allergy control
- Microfiber system: multiple cloths (separate for kitchen/bath/glass)
- Glass squeegee + microfiber: streak-free windows and mirrors
- Soft brushes: grout lines, corners, and delicate surfaces
- Neutral pH cleaner: for marble and premium finishes
- Degreaser (surface-safe): for kitchen grease buildup
- Disinfectant (approved use): bathrooms and high-touch points
8) Choosing Safe Chemicals for Villas (Without Damaging Premium Surfaces)
Large villas often feature high-end materials: marble, engineered wood, stainless steel, glass panels, and designer fixtures. A “one cleaner fits all” approach can cause permanent dullness, etching, or discoloration. The safest method is to match your solution to the surface.
Quick safety rules:
- Avoid acidic solutions on marble (no vinegar or lemon-based mixes).
- Avoid harsh abrasives on glossy finishes and stainless steel.
- Use a neutral pH cleaner on stone and premium tiles.
- Test any product on a hidden spot before full application.
- Never mix chemicals (especially bleach + ammonia or unknown combinations).
9) A Practical “Large Villa Cleaning Schedule” That Works
If you only deep-clean when the villa feels “too dirty,” the workload becomes overwhelming. A structured schedule keeps things under control and reduces the need for aggressive products.
| Frequency | Tasks | Why it matters |
|---|---|---|
| Daily | Kitchen wipe-down, quick bathroom refresh, tidy living zone | Stops grease and odors from becoming permanent |
| Weekly | Deep bathroom, vacuum all floors, mop traffic areas, dust high surfaces | Controls dust, hygiene, and visible shine |
| Monthly | Windows, behind furniture, upholstery refresh, grout attention | Prevents buildup and protects materials |
| Quarterly | Steam cleaning (as suitable), detailed cabinet work, deep floor care | Restores “like-new” condition |

10) Quality Control: The “Final 15 Minutes” That Makes the Villa Look Premium
Professional teams don’t finish when cleaning ends—they finish when the result is verified. The final 15 minutes should include a quick walkthrough to check:
- Streaks on glass and mirrors
- Grease film on kitchen cabinets
- Water spots on taps and shower glass
- Dust on high shelves, frames, and AC vents
- Floor shine consistency (no mop lines or residue)
This last check is what separates “clean” from “professionally clean.” In Part 2, we’ll move to small villas and show how to achieve strong results faster, with a simplified workflow and smart task prioritization.
Part 2: Effective Cleaning Methods for Small Villas
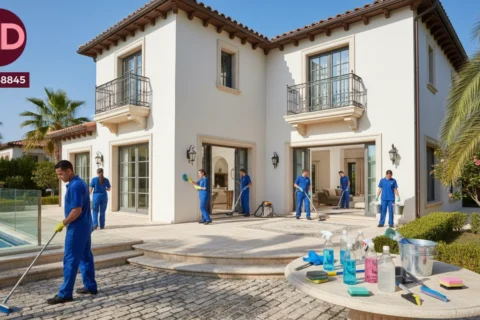
Small villas offer a unique advantage: fewer rooms, shorter distances, and faster turnaround times. However, this advantage can easily turn into a disadvantage if cleaning is done without a clear system. In compact villas, mistakes are more visible, clutter spreads faster, and poor sequencing can make the entire space feel messy even after hours of work.
This section focuses on efficient, high-impact cleaning methods for small villas. You will learn how to reduce effort, avoid wasted time, and still achieve a professional-level result. The goal is not to clean more—but to clean smarter.
1) The Biggest Mistake in Small Villa Cleaning
The most common mistake people make in small villas is treating every room with the same level of effort. This leads to over-cleaning low-impact areas while neglecting zones that define how clean the villa feels.
In small spaces, visual impact matters more than total effort. A perfectly cleaned bathroom and kitchen can make the entire villa feel spotless, even if secondary areas receive lighter attention.
2) The “Three-Basket Rule” Before You Clean
Before touching a vacuum or mop, professionals always reduce visual noise. In small villas, clutter has a much stronger effect on perception.
Use three baskets or bags:
- Return basket: items that belong in another room
- Laundry basket: clothes, towels, fabrics
- Discard basket: trash, packaging, expired items
This step usually takes 10–15 minutes but instantly makes cleaning faster and more effective. You stop cleaning around objects and start cleaning surfaces properly.
3) Smart Cleaning Sequence for Small Villas
Because the layout is compact, the sequence must be simple and repeatable. The best workflow minimizes tool changes and room re-entry.
- Ventilate the villa (open windows 10–15 minutes)
- High dusting (corners, shelves, lighting)
- Kitchen deep clean
- Bathroom disinfection
- Living areas and bedrooms
- Vacuum all floors
- Mop floors (final step)
This flow ensures that dust and moisture never travel backward into cleaned areas.
4) Priority Zones That Define Cleanliness
In small villas, certain areas control the overall impression more than others. These should always receive the highest attention.
- Kitchen surfaces: grease-free counters and cabinets
- Bathroom fixtures: shiny taps, clean drains, odor-free floors
- Living room floor: no crumbs, no streaks
- Entrance area: clean door, mat, and handles
5) Comparison Table: Small Villa vs Large Villa Cleaning Focus
| Aspect | Small Villa | Large Villa |
|---|---|---|
| Main challenge | Clutter & visibility | Scale & coordination |
| Cleaning speed | Fast if well organized | Slower without zoning |
| Visual impact | Very high | Distributed |
| Best approach | Simplified workflow | Zone-based strategy |
6) Daily, Weekly, and Monthly Tasks for Small Villas
Small villas stay clean longer when maintenance is spread out. The following structure reduces the need for heavy deep cleaning.
| Frequency | Tasks | Benefit |
|---|---|---|
| Daily | Kitchen wipe-down, quick bathroom refresh | Prevents grease and odor buildup |
| Weekly | Vacuum floors, mop, dust surfaces | Controls dust and allergens |
| Monthly | Windows, behind furniture, grout cleaning | Maintains fresh appearance |
7) Fast Kitchen Cleaning Without Cutting Corners
In a small villa, the kitchen is usually close to the living area. Any grease smell or dirty surface spreads quickly.
Efficient kitchen routine:
- Remove items from countertops
- Degrease backsplash and stove area
- Wipe cabinets and handles
- Clean sink and tap
- Final surface wipe and dry
8) Bathroom Cleaning That Feels “Hotel-Level”
Bathrooms in small villas create a strong emotional response. A clean bathroom feels luxurious; a dirty one ruins the entire experience.
- Descale taps and shower glass
- Disinfect toilet and sink areas
- Clean mirrors streak-free
- Dry surfaces to prevent water marks
9) Floor Care in Compact Spaces
Because floors connect all rooms, they must be cleaned last. Vacuum first to remove dust, then mop lightly. In small villas, excess water causes more damage than dirt.
10) Tools That Make Small Villa Cleaning Faster
- Lightweight vacuum
- Microfiber mop system
- Multi-surface cleaner (pH neutral)
- Separate cloths for kitchen and bathroom
11) Common Mistakes to Avoid
- Using too much water on floors
- Skipping ventilation after cleaning
- Using one cloth for all rooms
- Cleaning floors before dusting
12) Why Small Villas Benefit Most from Routine Cleaning
Small villas show dirt faster, but they also reward consistency. With a structured routine, cleaning becomes quick, predictable, and far less exhausting.
In Part 3, we’ll explore the major differences between cleaning furnished villas and empty villas—and why each requires a completely different mindset and technique.
Next: Part 3 – Furnished vs Empty Villas: Cleaning Differences & Best Practices
Part 3: Furnished vs Empty Villas – Cleaning Differences & Best Practices
Cleaning a furnished villa is fundamentally different from cleaning an empty one. While both aim for the same final goal—complete cleanliness—the approach, tools, time allocation, and risks involved are not the same.
Many people underestimate these differences and apply the same cleaning routine to both situations. This often leads to damaged furniture, wasted effort, or incomplete results. In this part, we break down the correct mindset, techniques, and workflows for each type of villa.
1) Understanding the Core Difference
The key difference lies in what you are protecting. In an empty villa, your main enemy is dust—especially fine construction or environmental dust. In a furnished villa, your biggest risk is surface damage: fabrics, wood, leather, glass, and decorative finishes.
This means that empty villas require more mechanical cleaning (vacuuming, mopping, wiping large surfaces), while furnished villas require more controlled, delicate, and selective cleaning.
2) Cleaning Priorities in Furnished Villas
Furnished villas contain multiple materials in close proximity. A single wrong product or technique can damage upholstery, fade fabrics, or leave permanent marks on wood or marble.
Main priorities when cleaning furnished villas:
- Protecting furniture and fabrics from excess moisture
- Removing dust without spreading it into upholstery
- Eliminating odors without overpowering fragrances
- Cleaning high-touch areas safely
- Maintaining the natural finish of premium materials
3) Cleaning Priorities in Empty Villas
Empty villas appear easier, but they hide unique challenges. Dust settles everywhere: inside cabinets, behind doors, inside sockets, window tracks, and ventilation openings.
Main priorities when cleaning empty villas:
- Removing fine dust from all surfaces
- Cleaning floors thoroughly without furniture obstacles
- Detailing corners, frames, and hidden areas
- Preparing the villa for immediate use or move-in
4) Comparison Table: Furnished vs Empty Villa Cleaning
| Aspect | Furnished Villa | Empty Villa |
|---|---|---|
| Main focus | Furniture, fabrics, surfaces | Dust, floors, details |
| Risk level | High (damage possible) | Low (few sensitive items) |
| Tools | Soft brushes, upholstery tools | Strong vacuum, large mops |
| Time needed | Longer due to detail work | Faster, more systematic |
5) Step-by-Step: Furnished Villa Cleaning Workflow
- Ventilate all rooms before starting
- Dry dusting of ceilings, shelves, and décor
- Vacuum upholstery and carpets using proper attachments
- Spot-clean stains (never over-wet fabrics)
- Wipe furniture surfaces with suitable cleaners
- Clean glass, mirrors, and metal finishes
- Vacuum floors
- Light mopping as final step
6) Step-by-Step: Empty Villa Cleaning Workflow
- High dust removal (ceilings, corners, vents)
- Cabinets, shelves, and drawers (inside and out)
- Doors, frames, switches, sockets
- Windows, tracks, and glass panels
- Vacuum all floors thoroughly
- Wet mopping with correct solution
- Final inspection and ventilation
7) Furniture & Fabric Safety Rules
Most cleaning damage in furnished villas comes from excess moisture and aggressive chemicals.
- Always test products on hidden areas
- Use minimal water on fabrics
- Avoid direct steam on delicate upholstery
- Do not mix cleaning chemicals
- Dry surfaces immediately after cleaning
8) Odor Control: Furnished vs Empty Villas
Furnished villas absorb odors into fabrics and cushions, while empty villas trap smells in drains and enclosed spaces.
Best practices:
- Use neutral deodorizers, not heavy perfumes
- Ventilate thoroughly after cleaning
- Clean drains and sink traps
- Allow fabrics to dry completely
9) When to Choose Professional Supervision
Large furnished villas, high-end furniture, or move-in preparation are situations where supervised cleaning delivers safer and more consistent results. A professional team follows checklists and quality-control steps that reduce the risk of costly mistakes.
10) Which Type Feels Cleaner?
Interestingly, furnished villas often feel cleaner when done properly because fabrics, décor, and lighting amplify freshness. Empty villas look clean visually but may still feel dusty if fine particles are not fully removed.
In Part 4, we’ll go deeper into one of the most critical topics: cleaning wooden floors, marble, and ceramic surfaces in villas—without scratches or dullness.
Next: Part 4 – Cleaning Wooden, Marble & Ceramic Floors in Villas
Part 4: Cleaning Wooden, Marble & Ceramic Floors in Villas
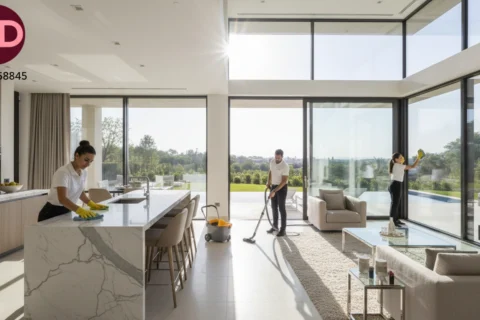
Floors are the visual foundation of any villa. They connect rooms, reflect light, and immediately communicate whether a home feels premium or neglected. Wooden floors, marble, and ceramic tiles are common in villas—but each requires a completely different cleaning approach.
Using the wrong technique or chemical can permanently damage floors: wood can warp, marble can lose its shine, and ceramic grout can darken. This part explains professional, surface-safe methods to clean villa floors effectively while preserving their beauty and longevity.
1) Why Floor Cleaning Is Different in Villas
Villas often feature large, continuous floor areas with minimal room separation. This means mistakes spread visually across the entire property. Excess water, poor product choice, or incorrect mopping techniques can leave streaks, dull patches, or long-term damage.
Professional floor cleaning focuses on three goals: dust control, surface protection, and uniform appearance.
2) Understanding Floor Types Before Cleaning
Before cleaning any villa floor, you must identify the material. Many surfaces look similar but behave very differently.
| Floor Type | Sensitive To | Safe Cleaning Focus |
|---|---|---|
| Natural Wood / Parquet | Water, abrasives | Dry cleaning, minimal moisture |
| Marble / Natural Stone | Acids, harsh chemicals | Neutral pH cleaners |
| Ceramic / Porcelain Tiles | Grout staining | Deep grout attention |
3) Cleaning Wooden Floors Without Damage
Wooden floors bring warmth and elegance to villas, but they are the most sensitive to incorrect cleaning. The biggest enemy of wood is moisture penetration.
Step-by-step professional method:
- Vacuum with a soft-brush attachment
- Remove loose dust and grit (prevents scratches)
- Use a microfiber mop slightly damp—not wet
- Apply wood-safe, pH-balanced cleaner
- Dry immediately if any moisture remains
Common mistakes to avoid:
- Pouring water directly on the floor
- Using steam cleaners on natural wood
- Scrubbing with abrasive pads
- Leaving wet areas to air-dry
4) Marble Floor Cleaning: Protecting Shine and Color
Marble floors are a signature feature in luxury villas. They reflect light beautifully but are chemically sensitive. Acidic substances—even natural ones like vinegar or lemon— can etch the surface and permanently dull its finish.
Safe marble cleaning process:
- Dry dust removal using microfiber or vacuum
- Clean with neutral pH stone cleaner
- Use soft mop motions (no pressure)
- Rinse lightly with clean water if needed
- Dry with a clean microfiber cloth
Regular gentle cleaning preserves marble shine far better than aggressive deep cleaning performed too often.
5) Ceramic & Porcelain Tiles: Grout Is the Real Challenge
Ceramic and porcelain tiles are durable and water-resistant, making them common in kitchens, bathrooms, and high-traffic areas. The tiles themselves are easy—the grout is not.
Professional tile cleaning method:
- Vacuum to remove sand and dust
- Mop with warm water and mild cleaner
- Spot-clean grout with a soft brush
- Rinse and remove residue
- Dry to avoid streaks
6) Comparison Table: Floor Cleaning Techniques
| Technique | Best For | Risk Level |
|---|---|---|
| Dry vacuuming | All floor types | Very low |
| Damp microfiber mopping | Wood, marble | Low |
| Steam cleaning | Ceramic (carefully) | Medium |
7) Floor Cleaning Frequency for Villas
How often floors should be cleaned depends on usage, family size, pets, and outdoor access.
| Frequency | Recommended Action |
|---|---|
| Daily | Dry dusting or light vacuum |
| Weekly | Damp mopping with safe cleaner |
| Monthly | Grout detailing and inspection |
8) Final Inspection: What Professionals Check
- Uniform shine (no dull patches)
- No sticky residue underfoot
- Clean grout lines
- No water pooling or streaks
Proper floor cleaning is not about making floors “wet and shiny”; it’s about maintaining material integrity while achieving a refined appearance.
In Part 5, we’ll move inside the most demanding areas of any villa: kitchens, bathrooms, and steam-cleaning techniques—where hygiene meets precision.
Next: Part 5 – Kitchen, Bathroom & Steam Cleaning Methods in Villas
Part 5: Villa Cleaning Methods for Kitchens, Bathrooms & Steam Cleaning
Kitchens and bathrooms are the most demanding areas in any villa. When people search for Villa Cleaning Methods, they are usually struggling with grease, limescale, odors, and hygiene issues that cannot be solved with surface-level cleaning.
Professional Villa Cleaning Methods treat kitchens and bathrooms as high-risk zones where incorrect products, poor sequencing, or skipped steps can quickly ruin the overall cleanliness of the villa.
1) Why Kitchens Require Specialized Villa Cleaning Methods
Kitchens combine heat, moisture, food residue, and grease. Over time, grease forms an invisible film on cabinets, walls, and appliances. Effective Villa Cleaning Methods focus on removing this film safely without damaging finishes or spreading odors.
Key kitchen problem areas:
- Extractor hood and filters
- Backsplash behind stove
- Cabinet doors and handles
- Sink, drain, and tap base
- Appliance fronts (oven, fridge, dishwasher)
2) Step-by-Step Villa Cleaning Methods for Kitchens
- Remove all countertop items
- Apply surface-safe degreaser to hood and backsplash
- Clean cabinet fronts and handles (top to bottom)
- Degrease stove and oven exterior
- Clean sink, drain, and tap thoroughly
- Wipe all surfaces with clean microfiber
- Dry surfaces to prevent streaks
These Villa Cleaning Methods prevent grease from hardening and reduce the need for aggressive chemicals in the future.
3) Kitchen Degreasers: What to Use and What to Avoid
| Product Type | Safe Use | Villa Cleaning Notes |
|---|---|---|
| Professional degreaser | Stove, hood, backsplash | Use briefly, then rinse & dry |
| Mild detergent | Cabinets, counters | Ideal for routine Villa Cleaning Methods |
| Abrasive cleaners | ❌ Avoid | Damages finishes and coatings |
4) Villa Cleaning Methods for Bathrooms (Hygiene First)
Bathrooms define hygiene standards in any villa. Poor bathroom cleaning instantly lowers the perceived quality of the entire home. That’s why professional Villa Cleaning Methods focus on descaling, disinfection, and moisture control.
Main bathroom problem zones:
- Shower glass and frames
- Taps and fixtures
- Toilet base and hidden edges
- Drain covers and corners
- Mirrors and cabinets
5) Step-by-Step Villa Cleaning Methods for Bathrooms
- Apply descaler to taps and shower glass
- Allow product to activate (2–5 minutes)
- Scrub gently with soft brush or pad
- Disinfect toilet, sink, and high-touch areas
- Clean mirrors with streak-free solution
- Rinse all surfaces lightly
- Dry completely to prevent water marks
6) Steam Cleaning as Part of Villa Cleaning Methods
Steam cleaning is often misunderstood. When used correctly, it is one of the most powerful Villa Cleaning Methods for kitchens and bathrooms—but when misused, it can damage surfaces.
Where steam cleaning works best:
- Bathroom tiles and grout
- Shower corners and seals
- Kitchen tiles and grease buildup
- Sanitary surfaces (non-porous)
Where steam should be avoided:
- Natural wood
- Delicate paint finishes
- Unsealed stone
- Low-quality laminate
7) Comparison Table: Traditional vs Steam Villa Cleaning Methods
| Method | Best For | Notes |
|---|---|---|
| Chemical cleaning | Heavy grease, limescale | Requires correct product choice |
| Steam cleaning | Sanitizing hard surfaces | Eco-friendly Villa Cleaning Method |
8) Odor Control Using Professional Villa Cleaning Methods
Odors often come from grease traps, drains, and damp surfaces. Effective Villa Cleaning Methods eliminate the source, not just mask the smell.
- Clean sink traps and drains
- Dry wet areas immediately
- Ventilate after cleaning
- Avoid heavy artificial fragrances
9) Cleaning Frequency for Kitchens & Bathrooms
| Frequency | Recommended Action |
|---|---|
| Daily | Surface wipe & quick ventilation |
| Weekly | Full kitchen & bathroom clean |
| Monthly | Steam cleaning + descaling |
10) Signs Your Villa Cleaning Methods Are Effective
- No greasy film on cabinets
- No limescale on taps or glass
- No persistent odors
- Dry, streak-free surfaces
When kitchens and bathrooms are cleaned using correct Villa Cleaning Methods, the entire villa feels healthier and more luxurious.
In Part 6, we’ll complete the guide with windows, furniture, children’s rooms, gardens, post-construction cleaning, FAQs, customer reviews, and a clear call to action.
Next: Part 6 – Complete Villa Cleaning Methods (Windows, Furniture, Post-Construction, FAQ & Reviews)
Part 6: Complete Villa Cleaning Methods – Windows, Furniture, Children’s Rooms, Gardens, Post-Construction, FAQ & CTA
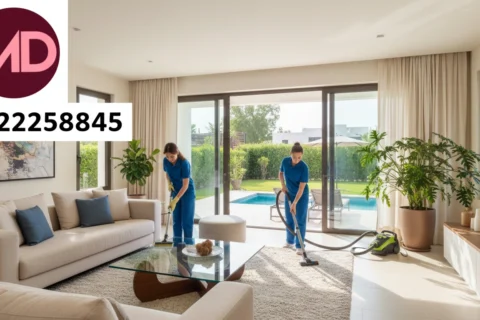
This final part completes the full guide to Villa Cleaning Methods. After covering large and small villas, furnished versus empty spaces, floors, kitchens, bathrooms, and steam cleaning, we now focus on the remaining elements that determine whether a villa feels truly finished.
Windows, furniture, children’s rooms, gardens, and post-construction dust are often overlooked or rushed. Professional Villa Cleaning Methods treat these areas with precision, safety, and consistency—ensuring a premium, long-lasting result.
1) Villa Cleaning Methods for Windows & External Glass
Windows are one of the most visible indicators of cleanliness. Streaks, water marks, or dusty frames instantly reduce the perceived quality of a villa. Correct Villa Cleaning Methods focus on technique—not excess chemicals.
Professional window cleaning steps:
- Dry dust removal from frames and tracks
- Apply streak-free glass solution lightly
- Use squeegee with consistent vertical or horizontal strokes
- Wipe edges and corners with microfiber cloth
- Final inspection under natural light
These Villa Cleaning Methods prevent residue buildup and keep glass clear for longer periods.
2) Villa Cleaning Methods for Furniture & Curtains (Damage-Free)
Furniture and curtains absorb dust, odors, and allergens. Incorrect cleaning can cause fading, shrinkage, or permanent stains. Professional Villa Cleaning Methods prioritize fabric safety.
- Vacuum upholstery using fabric-safe attachments
- Spot-clean stains (never soak)
- Use low-moisture or steam-assisted methods where suitable
- Allow full drying before use
- Avoid aggressive brushing or harsh chemicals
3) Villa Cleaning Methods for Children’s Rooms (Safe & Gentle)
Children’s rooms require special attention. Safety and air quality matter more than strong fragrances. Effective Villa Cleaning Methods here are gentle, thorough, and designed to reduce allergens.
Best practices:
- Use mild, low-odor cleaning products
- Vacuum floors and mattresses with HEPA filtration
- Clean toys and desks with safe disinfectants
- Ventilate well after cleaning
4) Villa Cleaning Methods for Gardens & Pools
A villa’s exterior is part of the overall experience. Even the best interior cleaning feels incomplete if outdoor areas are neglected. Professional Villa Cleaning Methods include basic garden and pool-side hygiene.
- Cleaning outdoor furniture
- Washing patios and walkways
- Removing leaves and debris
- Cleaning pool edges and surrounding tiles
5) Villa Cleaning Methods After Construction or Renovation
Post-construction cleaning is one of the most challenging phases. Fine dust settles everywhere and normal cleaning methods are not enough. Specialized Villa Cleaning Methods are required to prepare the villa for living.
Post-construction workflow:
- HEPA vacuum of ceilings, walls, and floors
- Removal of paint, adhesive, and residue (surface-safe)
- Detailed cleaning of frames, sockets, switches
- Window and glass cleaning
- Final floor care and ventilation
6) Villa Cleaning Methods Using a Regular Maintenance Plan
The most effective Villa Cleaning Methods are not one-time actions. A structured routine reduces costs, protects materials, and keeps the villa consistently presentable.
| Schedule | Focus |
|---|---|
| Weekly | General cleaning & hygiene |
| Monthly | Windows, grout, upholstery refresh |
| Quarterly | Steam cleaning & deep detailing |
Frequently Asked Questions About Villa Cleaning Methods
1) How often should villa cleaning be done professionally?
Most villas benefit from professional Villa Cleaning Methods every 1–3 months, depending on usage, family size, and pets.
2) Are steam cleaning methods safe for all villas?
Steam cleaning is effective for tiles and bathrooms, but it should be avoided on natural wood or unsealed stone unless approved by the manufacturer.
3) What is the biggest mistake in villa cleaning?
Using the same product and method on all surfaces. Professional Villa Cleaning Methods always adapt to materials.
4) Can regular cleaning replace deep cleaning?
Regular cleaning delays buildup, but deep cleaning is still essential for hygiene and long-term material protection.
5) Are eco-friendly villa cleaning methods effective?
Yes, when used correctly. Many modern Villa Cleaning Methods rely on steam and neutral products for safe, eco-friendly results.
Customer Reviews
⭐⭐⭐⭐⭐ Ahmed Al-Kaabi – Dubai
“The villa felt brand new. The cleaning methods were clearly professional and well-organized.”
⭐⭐⭐⭐⭐ Fatima Al-Mansoori – Abu Dhabi
“Bathrooms and kitchen were spotless. No odors, no residue—excellent villa cleaning methods.”
⭐⭐⭐⭐⭐ Saeed Al-Nuaimi – Sharjah
“Post-construction cleaning was perfect. Even fine dust was completely removed.”
⭐⭐⭐⭐⭐ Mariam Al-Shamsi – Ajman
“Very careful with wooden floors and furniture. Professional and safe methods.”
⭐⭐⭐⭐⭐ Khalid Al-Dhaheri – Dubai
“Organized, detailed, and reliable. The villa stayed clean for weeks.”
Book Now
If you are looking for reliable, safe, and professional Villa Cleaning Methods that deliver lasting results, book your service today.
📞 Call or WhatsApp: 0522258845
A clean villa is not just about appearance—it’s about comfort, health, and long-term value. Choose the right methods, and the results will speak for themselves.